Showing posts with label flat brush. Show all posts

Wednesday, 10 July 2019

How to paint pansies with You Can Folk It

Introducing our luxe label Angle shaders... 

Angle Shaders are used for many of the same brush strokes that can be created with the flat brush and in many cases, it makes the strokes a little easier.  One of the techniques the Angle Shader is useful for is 'floating' colour (the technique taught in our Cupcakes and Babushka kits) as the angle of the brush allows you to blend the paint on the brush nicely and the nice sharp point allows you to get into the awkward areas more easily. 


DecoArt Americana Pansy Lavender
DecoArt Americana Titanium White
DecoArt Americana Lamp Black
DecoArt Americana French Mauve
DecoArt Americana Teal Green 
DecoArt Drying Time Extender 

Brushes & Equipment used:

Pen/Pencil


1. Transfer the design (if you are completing a practice board, transfer 3 pansies to create a step by step reference as above) and use the No 8 Lux Angle Brush to base coat the larger leaves with Teal Green and use the No. 3 round brush. Mix Teal Green with a touch of Titanium White and basecoat the smaller leaves.


2. Add a touch of Lamp Black to the Teal Green and use the liner brush to apply a comma stroke vein on each leaf

3. Next, basecoat the ribbon using French Mauve.

Tip: for each of the above, paint the colours over the outline of the pansy slightly as we want these to look like they are behind the pansy in the finished piece. 


4. Use the No. 10 Lux Angle Shader to 'float' Titanium White around the edged of the larger leaves and the No 8 Angle Shader for the smaller leaves

5. Look at the pattern sheet and note that the floating on the ribbon is where the marks appear.  Float Titanium White along the marked edges (note this is the opposite edges)  Take care to join up where the 'float' meets, this will give the illusion of the twist in the ribbon

Tip: When floating colour, apply thin coats and build up with several coats rather than one heavy coat, this will give you a much better end result.

6. Basecoat the back two petals with Pansy Lavender. Next, add a little white to the lavender and basecoat the next two petals.  Finally, add a touch more white and basecoat the front bottom petal.  Apply a float of Titanium White around each petal on the pansy


7. Use the liner brush & Lamp Black to apply the centre of the pansy - add water to the brush to achieve some nice fine strokes.  Make sure you note the direction of the strokes and make sure you are putting a slight bend in them and they are not straight.  Finish with 2 comma strokes using the liner brush & Yellow Ochre.

8.  Apply dot daisies using Titanium White & French Mauve.

9. To complete the flowers, load the liner brush with Teal Green and 'tip' with Titanium White, 'tap' the end of the brush around the daisies to create filler foliage. 


If you have a go at this tutorial, we would love to see your pansies. Please tag us in social media or email your photos to toni@folkit.co 

Happy Folking! 


SHARE:

Monday, 10 December 2018

Christmas Cupcakes in 10 easy steps


What you need: 
Card/envelope/mountboard (or bauble mount board) 
Tracing paper & transfer paper*
Flat Brush, Medium Liner Brush and Dotting tool* 
You Can Folk It Cupcakes painting kit 
DecoArt Americana acrylics in Razzle Berry, Holly Green, Lamp Black and Titanium (Snow) White 
Drying Time extender*

*All included in our Flat Brush Starter Kit


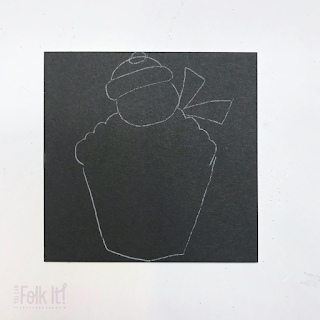
An outline of a cupcake with a snowman sat on the top.

Step 1: transfer our Snowman cupcake pattern to your surface. This will fit perfectly on one of our square mount boards or baubles. 


Painted white silhouette of the a snowman topped cupcake.

Step 2: To help the colours on your final piece pop, base coat the entire area of your design with white using your flat brush.  


White silhouette of a snowman topped cupcake with pencil lines marking out the details


Step 3: Transfer the lines you need back onto the painted area.  


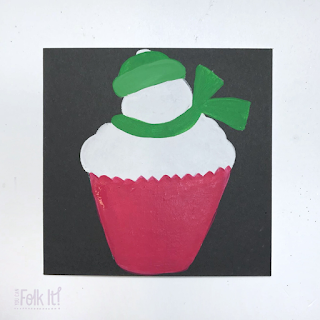
Snowman topped cupcake - with painted areas of red (the cupcake wrapper) and green (for the Snowmans hat and scarf)

 Step 4: Using your flat brush again, base coat the cupcake wrapper in red and the top of the snowman's hat using Green.  Before base coating the rim of the hat and the scarf, add a little white to make it just slightly lighter.


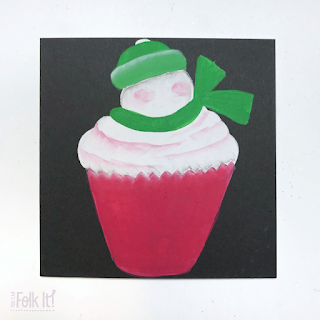
Hand painted snowman topped cupcake with highlighted and shaded areas to make it look 3D

Step 5: Using the Razzle Berry, float colour onto the cupcake to add texture, just as you would in our cupcakes kit.  Don't forget to add rosy cheeks too! 

Step 6: Using white, float colour around the base of his hat to highlight it. 

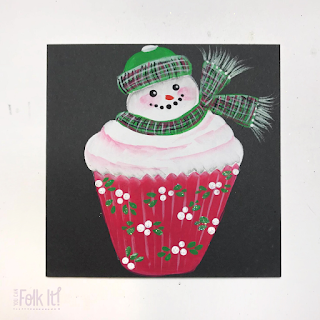
Handpainted snowman topped cupcake design. The snowman is dressed in a green tartan hat and scarf to compliment the red festive cupcake wrapper.

Step 7: Using your liner brush, add a pattern to his scarf and hat.  Begin with Razzle Berry and Black before adding white lines, edging and tassels. (Don't forget to add a little bobble on his hat too!)   

Step 8: Using the large end of the dotty tool, add his eyes and mouth.  Using the small end, add two dots of white to each eye.  Add his carrot nose using the liner brush (or you can apply it using the dotting tool) 

Handpainted snowman topped cupcake design Christmas card. Thesnowman wears a green tartan hat and scarf and the red cupcake wrapper is decorated with white berries and leaves

Step 9: Float white lines on the cupcake (as shown in our kit) and add berries to the area using the dotting tool. 

Step 10: Apply Crystal Glamour Dust to the design as you paint to create that all important sparkle at winter time.  

Hand painted snowman topped cupcake Christmas card design painted on to a card and mount board bauble shape that can be used as a gift tag

Don't fancy making a card? Why not try adding it to one of our baubles?


SHARE:

Thursday, 8 November 2018

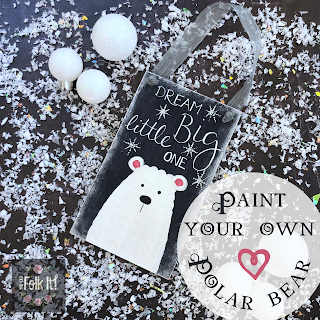
Paint your own folky Polar Bear

A dark hand painted plaque painted with a polar bear and snowflakes. The handwritten quote on the plaque says 'Dream Big little one' and is threaded with silver ribbon to hang on a door.


Following the success of our Folky Fox recently, we have gone from Autumn to Winter with this brand new tutorial.  

To complete this level 2 tutorial, you will need: 

DecoArt Chalky Finish paint in Honor 
Sandpaper, tracing paper* and transfer paper* 
Sponge*
Dotting tool*, Flat Brush* & Liner brush*
DecoArt Titanium (Snow) white* (or any white you have), Lamp Black and Antique Rose* 
DecoArt Dazzling Metallics in Shimmering Silver 
Sakura Gelly Roll pen in White 
DecoArt Metallic lustre in Silver Spark

*All included in our Flat Brush Starter kit 

Practice paper, paintbrushes, DecoArt Metallic Lustre and the polar bear traced pattern from You Can Folk It

 Preparing your plaque: 

 Using the sponge, base coat the plaque using the Honor chalky finish paint.  You can speed this process up with a hair dryer if you like. 
After applying a couple of coats, lightly sand the MDF plaque before transferring your design on to the surface.  

A photo showing DecoArt Americana Acrylic in Warm white and practice rows of C strokes painted using the Flat brush in the picture


Practicing your brushstrokes: 

For the Polar Bear you will need to practice the C stroke taught in the Rosebuds kit.  When you are confident painting single ones, practice painting each one side by side in rows.  


Painting your polar bear:

Using the warm white and flat brush, base coat the whole of the polar bear.  Using the Antique Rose, paint the inner part of the bears ears.  When this is dry, paint rows of c strokes over the whole of the bears body starting at the top and working down, leave to dry. Take care to try to overlap the rows a little to create your fur pattern.  

Next, using your liner brush and the black paint, add his eyes and nose. 

A photo of the completed dark blue rectangular wooden plaque painted with a polar bear and decorated with snowflakes. The phrase 'Dream Big Little One' is hand written across the top

Final touches: 

Using the silver paint and Dotting tool, add dotty snowflakes on the plaque. Leave to dry.  If you wish to add the lettering, use the Gelly Roll pen (or a fine Uni Posca paint pen) to copy over the transferred lettering.  You may need to keep wiping the tip of the pen with a tissue to make sure the tip does not get clogged with paint.  Finally, using the sponge, add the Metallic lustre around the edges of the plaque and add some ribbon to hang.  

If you did not wish to add the writing we have provided why not stamp a name on to personalise or just add more dotty snowflakes.  

Happy Folking x 

SHARE:
© You Can Folk It!. All rights reserved.
designed by pipdig