Showing posts with label halloween. Show all posts

Sunday, 20 October 2019

DIY Trick or Treat bag for Halloween

Handpainted and hand lettered DIY Trick or Treat bag


Our colour palettes, just like out wardrobe has just got a whole lot more Autumnal.  As we come up to the scariest month of the year, we decided to transform our popular Pumpkin tutorial from pretty to  scary and made our own bag for a little Trick or Treating fun this Halloween.

Materials we used: 

Black gift bag from Paperchase 
Tangelo Orange, Titanium White, Primary Yellow, 
Avocado, Burnt Umber, Lamp Black.  
(If you don't have the exact colours listed above but have something similar, use that). 
No 8 Angle Brush
No 8 Flat Brush 
Luxe Liner Brush 
Lettering - Uni Posca Paint Pen (fine) in White
Tracing and Transfer Paper 
Pen or Pencil to transfer the design

For this tutorial, you can find our pattern here

Once you have transferred your design onto your chosen project, because they will sit behind the pumpkins, paint the leaves and add the vines with your liner brush (optional).   
We have used the flat brush ruffle stroke to create these but you can paint your leaves however you wish so if you feel more comfortable with comma stroke leaves choose those.  

Next, base coat your pumpkin with the flat brush and add light and shade the two side pumpkins as shown in last years tutorial. Again, as these will sit behind the larger centre pumpkin, you only need to paint up to the centre pumpkin.   

Note: When adding light and shade, we swapped the flat brush for the Angled Shader as it allows you to be more precise when adding colour.  However, feel free to try both and find your preference.  

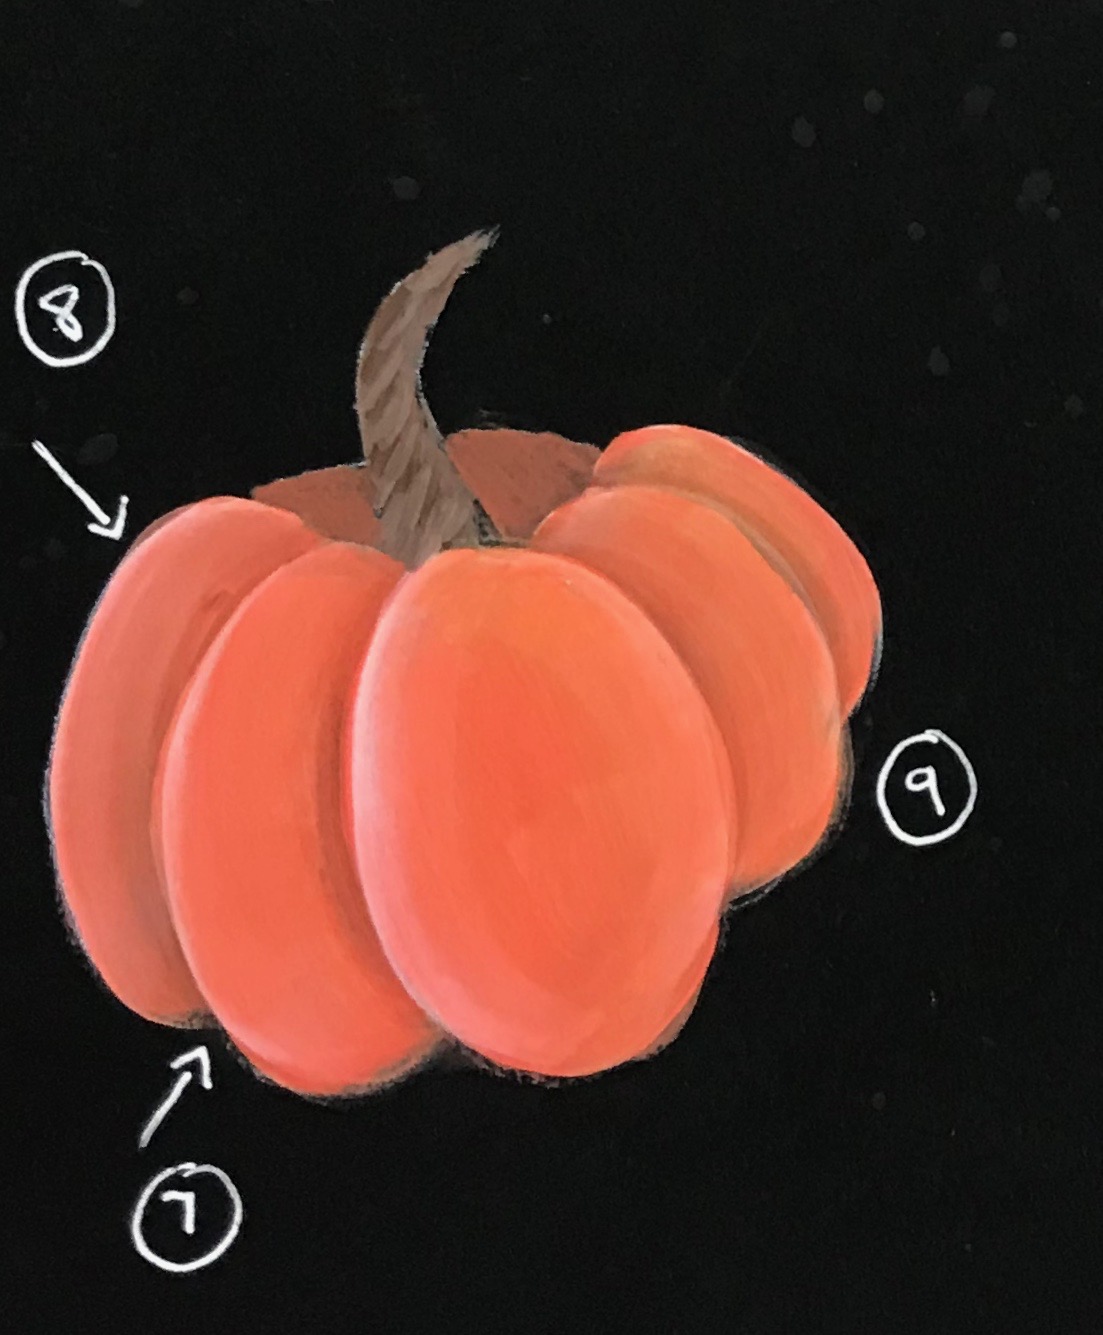
Once dry, base coat and shade the centre pumpkin as shown in the tutorial.  When this is dry, looking at the design, you need to bring the centre pumpkin to the front of the design. To do this, float a little Burnt Umber around the outer edges of the larger pumpkin where the centre pumpkin meets the smaller pumpkins as indicated below.  


Once the centre pumpkin is dry, transfer the face to the large pumpkin and using your liner brush, fill it using Lamp Black.  

Finally, fill in the lettering using the white paint pen.  

Once dry, fill your bag with treats ready for Trick or Treaters to pick from or take it out to fill with candy yourself ;)  

Bright pumpkin trio perfect for a unique trick or treating bag


SHARE:

Monday, 22 October 2018

Paint your own pumpkin tray - perfect for Halloween


You will need:
You Can Folk It! Brushes & Tools
Medium Liner, Flat Brush, Dotting Tool
DecoArt Americana: Tangelo Orange, Burnt Umber, Warm White, 
Avocado, Bright Yellow
Other: Practice paper, tracing paper, transfer paper

Before painting your project, practice all the elements on the practice paper. (You can find the patterns on our Folk It patterns Pinterest board.)  It's always a good idea to try painting the larger Pumpkin from the practice sheet first before moving onto the smaller ones.


1. Add a touch of Burnt Umber to Tangelo Orange and paint around the stem

2. Add a touch of Burnt Umber to Warm White and paint the stem

3. Add water to Burnt Umber and with this watery mix & your liner brush apply uneven diagonal lines to the stem

4. Add a touch of Tangelo Orange to Warm White and starting at the back paint each section of the Pumpkin using a 'C' stoke. 

5. Apply a second coat of this mix if necessary.  Tangelo Orange is a transparent colour, therefore we are creating a base so that the colour stays vibrant.  If you are painting onto a light coloured surface you can omit this step.

6. Next apply a coat of Tangelo Orange to the front sections.

7. Float Burnt Umber. (This is a technique we teach in our Flat Brush Cupcakes and Babushka kit) Before beginning this step, study the pumpkin below for a moment, bearing the following in mind... The Burnt Umber is going to create a shade, so we are floating the darker colour to any section that is behind another.  

8. Float Warm White on the edges of the Pumpkin that sit in front of another.  By using this technique, we help flat objects take shape. To the eye, dark colours recede so look further away and light colours advance and so appear closer. 


9. Make a wash with your flat brush using plenty of water and Bright Yellow and apply over the whole Pumpkin, see how this has reduced the whiteness of the floated highlights, this is a great way to dull your floated colours if you have just started learning...it also gives the Pumpkin a lovely warm glow.


10. The leaves are created using the wiggle stroke as taught in the Butterflies lesson, a comma stroke using the flat brush and combining the 2 together.  If you have not yet progressed to this level, then use your favourite leaf. 


11. The blossoms are as taught in the Oriental Blossom Lesson.  Use Warm White to paint each of the Petals and apply dots using Burnt Umber & Tangelo Orange.  


Once you are happy with your skills, you can create your final design.  If you wanted to create your own wreath design, you can learn more about how to do that here. To create your wreath, begin by painting the pumpkins.  When painting the stalks, try to paint them in different directions to add variety. 

Next, add your leaves.  Using single leaves and clusters, aim to fill the majority of your circle.  If you do not feel comfortable using the ruffled technique, use whichever technique you do feel comfortable with.  We painted leaves in a few sizes, again to add interest to the design.  

Next, add single blossom flowers around the wreath - don't worry if they overlap areas you have already painted.  Finally, identify any areas that look empty and add dots (using the small end of your dotting tool) and small comma strokes using your liner brush.  

To seal your work, you could use DecoArt wax however, if you have painted a tray as we have done, it is better to opt for a couple of coats of varnish to protect your project.  
SHARE:
© You Can Folk It!. All rights reserved.
designed by pipdig