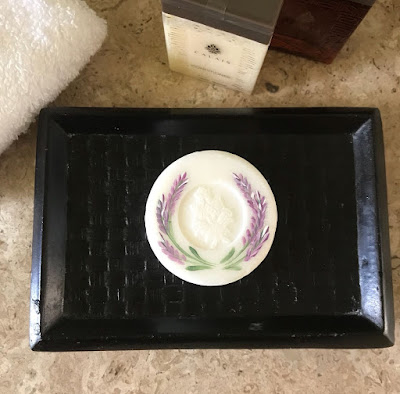
I first learned to paint onto soap years ago when I first discovered Folk Art. I had seen decorated soap before but always thought it was something other people did, not something as easily achievable as it is.
Sometimes, when you are learning to paint, you want to try something different, sometimes you wish to give a unique gift...the great thing is this project ticks both boxes. I was recently on holiday in Mexico and their complimentary soaps were so lovely, I just couldn't resist painting them!
For this project you will need:
A bar of soap of your choice
Paint Adhesion Medium or Multi Purpose Sealer
The design of your choice (I chose Butterflies and the Lavender design taught in our Round Brush Course)
For these designs I used the No3 Round Brush, Liner brush and Flat brush from both of our Starter Kits
DecoArt Americana Acrylic (I used Blue Violet, Warm White, Plum, Lamp Black and Hauser light Green)
Step 1: Begin by applying a coat of Sealer (or Paint Adhesion Medium) to the area you wish to add your design to.
Step 2: Once the sealer is dry (you can speed the process with a hair dryer if you wish), paint your chosen design. With both of the soaps, I tried to choose designs that worked with the shape/detail already on the soaps. Leave the design to dry.
Step 3: Finish by painting 3 more thin layers over your design, drying with a hairdryer each time to help the drying process along and dry each layer.
Step 4: Leave to dry for a couple of days for the paint and sealer to cure (dry and harden completely). The layers of sealer creates something similar to a transfer on the soap. Once it has been allowed to cure, this means you can use the soap as you would a normal bar of soap and the design will remain firmly in place.
I hope you have fun with this project.
Happy Folking,
Carol x


No comments
Post a Comment