Thursday 26 July 2018

How to paint a wreath - part 2


So, the other day, we had a go at building a floral wreath, combining a few flowers and features to paint a full wreath.  This week, we are going to look at a few other options to consider when you are designing your own unique pattern.


Option 1: The incomplete wreath

This option works with a circle but instead of wrapping your design around the whole circle, it consists of two halves.  Here, we used our Oriental blossom which gave us an irregular shape but you could adapt this to use Rosebuds, daisies or a mix of flowers.

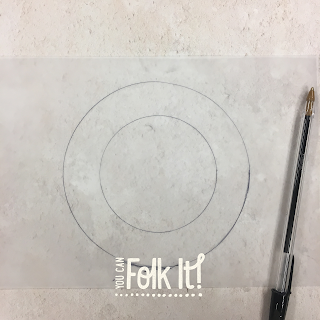
Step 1: Draw your circle lightly using a compass and pencil or by drawing round a circle using the chalk paper to transfer your markings.


Step 2: Imagine you cut your circle in half horizontally. Like last time, we are going to work closely to the circle but won't be afraid to detour slightly.  Starting just above the half way line on the right hand side, draw your branch outline and finish at the opposite side. Add small branches on both sides of your line, again following the route of the circle.  Next, leave a gap and draw a similar line from the left side round to the right.  Now you should have two branches trailing the circle shape.  Paint your branch using a shade of brown of your choice.

Step 3: Using the rule of 3 or 5, add your blossom flowers where you like.  This will mean you will end up with 1 or 2 on the bottom branch and 2 or 3 blossom flowers on the top branch depending on how big your circle is and what you prefer.

Step 4: Finish your wreath by adding individual petals one by one.  This is where you will need to keep taking a step back and seeing where your design looks too empty or where you need to even up your pattern.

Option 2: The Floral wreath

This wreath is quite tight and is perfect for those smaller flowers like rosebuds, lavender heads or dotty flowers.

Step 1: Begin by drawing a short line from your circle towards the inside of the circle, following the line of the circle.  Next, about 1.5cm/2cm along the line, draw a line away from the circle. Continue to draw alternating lines around the whole circle.


Step 2:  Using your liner brush, paint a line around the circle (but don't paint the stalks yet). Add a rosebud to the end of each line you have drawn (as you can see each rosebud follows the direction of the stalk).

Step 3: Fill in the gaps between each rose bud with s stroke leaves.  As you can see, we could fit one leaf in most of the spaces in the inner ring and 1 or two leaves between the roses on the outer circle.  Keep observing your wreath as you paint. The key to creating an eye catching wreath is to space out your elements and not squash too many things in to one space.

Step 4: Using your liner brush, paint stalks from the rosebuds and from each leaf to your original circle.

Step 5: Take a look at your wreath. Are there any areas that feel empty? We found a few and used the small end of our dotting tool to add three dots in places to complete the design and even up the wreath.

Option 3: The curved wreath

This is a great design for when you want to paint a limited number of elements such as lavender or foliage.  If you haven't attended one of our painting workshops and aren't sure how to paint lavender, you can easily use our dotty lavender from the Flat Brush Starter kit 


Step 1: Imagine you have used a curved line to divide your circle in to sections.  Draw the last section of these lines across the circle, keep turning your page as you draw each one to make sure they flow in the same direction.  You should end up with something like this (above). If you do not feel confident drawing out this template, pop over to our patterns board to use ours.

Step 2: Using your round brush or dotting tool, paint each lavender stalk using purple (we used Plum from our Flat Brush Starter kit and white).  If, like we found, this created a nice wreath but left quite a bit of space in between the stalks, add extras in between to fill your wreath out nicely.


Step 3: Step back and take a look at your wreath.  Are there any spaces? Using your liner brush and some green paint (we used Hauser light green) we added a few long comma strokes to fill some areas.  We also used the small end of our dotting tool to again even up the circle.

We do hope you enjoy these patterns and ideas and if you do create a design after reading this post we would love to see it - just tag us or use #funwithfolkit to share.

Happy Folking x


SHARE:

Wednesday 11 July 2018

How to paint a wreath - part 1


Wreaths are everywhere at the moment aren't they?! Whether they are being handpainted during an Instagram video, adorning a greetings cards or being featured on some gorgeous stationary, their popularity shows no signs of waning.

We have certainly seen the attraction of wreaths since launching our Folky Christmas kit a few years ago.  There is something so relaxing about layering up the different shades of paint and creating the wreath design to create a beautiful festive greetings card. However, what was once a symbol of the Christmas period has now become much more versatile. Whether they are made of flowers, ribbon, photos or pom poms, there is a wreath for every style and every occasion and this is also becoming the case for those wreaths we paint.

For our #funwithfolkit painting challenge this month, we have been focusing on wreaths and it is clear that this has captured the imagination of so many of you.  If you don't fancy creating your own classic foliage wreath from our Dotty Collection painting kit, we thought we would put together a few steps to help you create your own painted wreaths using the kits you already have.

Create a template to guide you when you are designing your wreath

Step 1: Create a guide for you to work to by drawing round a circle or using a compass.  If you feel like you would like more structure to work with, draw a smaller circle within the larger circle.

Use the Rule of 3 and add flowers to your wreath, space them evenly around your ring.

Step 2: When creating your wreath, it helps to balance out some of the larger elements (e.g. vintage roses or daisies) with smaller elements (dotty flowers and leaves) The great thing here is that there are no limits - you can include what you want and leave out flowers or brushstrokes that you are less confident with.  A good tip to remember is to stick with odd numbers.  On a smaller wreath, work with three larger elements like we did here. If you are working on a larger wreath, use 5 flowers and so on to suit the size of your finished piece, this will make the finished piece more aesthetically pleasing.

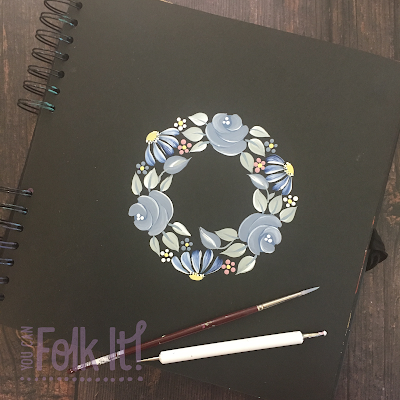
First, mark out where your largest flowers will be.  Here we began with roses arranging them around the circle.

Use the rule of 3 - add your large flowers to the ring, if there is space, rotate your page and add three more or three different flowers

Step 3: Next, because we had enough space, we rotated our design and added three daisies before adding leaves with our round brush (again, adopting the rule of 3 to add leaves to each side of the roses).  Remember: You can work slightly inside and outside of your guide (as we have in the placement of the leaves) but always try to stay close to your original guide to prevent a wonky or uneven wreath!


When creating a wreath, you may be the type of person who likes to plan where you will add each element. To do this, you can draw out a pattern in a sketch book to trace and transfer it to your painting journal.  The important thing is that you find a process that suits you.

After adding your larger elements, fill any gaps with smaller items such as Rosebuds, dot flowers or comma strokes


Step 4: Once you have added the larger flowers and details, take a look at your wreath to see where there are gaps and fill with smaller details like dot flowers, rosebuds, a sprig of lavender or berries....anything that takes your fancy.

Folk Art painted wreath from You Can Folk It

Step 5: Once your wreath is complete, sit back and admire!


If you have created it as you paint and would like to keep the pattern, leave your design to dry before covering with transfer paper and drawing out a rough guide of where everything is.  As you can see, we have traced within the edges of the painting. This means that when you come to paint it, you will cover the lines you have transferred.  This is a great way to build up a collection of patterns and it means that you can try it again using different colours.

Pattern from You Can Folk It using different painting kits to create a beautiful painted floral wreath

We'd love to see your finished wreaths - tag us in your social media posts and use #funwithfolkit

Happy Folking xx

SHARE:

Tuesday 3 July 2018

10 painting projects to inspire you


Well another month has flown by and so has another monthly theme for our #funwithfolkit challenge.  When we posted our first Flora and Fauna themed project, we never expected it would be as popular as it was, getting thousands of views within the first week of being posted.  If you haven't seen it yet, why not pop over to the blog post here for a look. 

It seems that there are two camps for these challenges, those that love incorporating the themes in to their Folk It designs and those that run with it to create their own unique ideas.  However you interpret them, we love them all.  Here we have rounded up our favourites for the month of June.  


Inspired by Cath Kidston, we love Jackys version - complete with You Can Folk It's Vintage Roses and ladybirds

Jacky from Chloe and Kato recently rediscovered her painting mojo and created this beautiful spray of daisies and roses - inspired by her favourite mug! We have to say though, it is definitely cuter with a few ladybugs. 


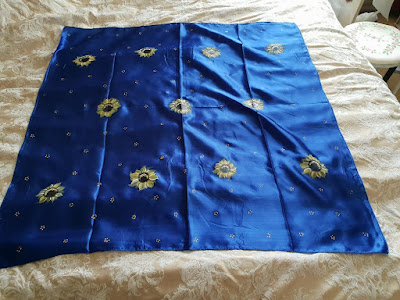
Fabric painting from Jackie - such a beautiful scarf and our Sunflower design looks great against the blue fabric

Painting on fabric takes practice, painting on silk is a labour of love but Jackie from Jacbnimble Crafts has done brilliantly creating this scarf for her friend.  

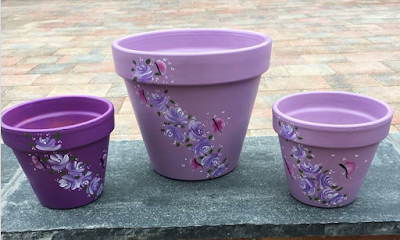
Jaxs used our Butterflies and Vintage Rose painting kits to decorate these pretty pots #giftidea #folkart

Jaxs from Vintage Crafts by Jax has created these gorgeous purple plant pots using our Butterfly and Vintage Rose kits.   By using a limited colour palette she has created a beautiful set of gifts that really stand out.  

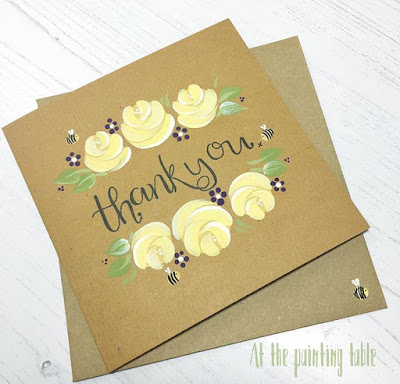
Beautiful Vintage roses and cute bees! We love it!

The lovely Folker from At the Painting Table has got creative to add the cutest bees to these delightful yellow roses - the perfect painting project for summer


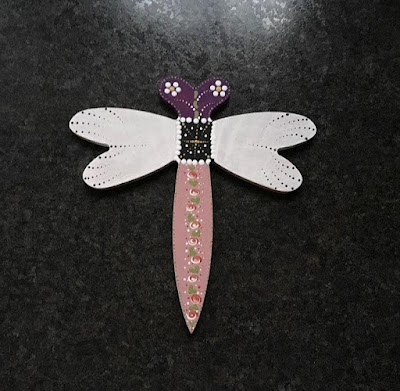
Painted dragonfly - decorated using You Can Folk It's Round Brush Starter kit

Vanessa has found this lovely dragonfly shape to decorate for the Flora and Fauna theme.  Dot daisies, dot roses and other dot patterns, it's got it all!

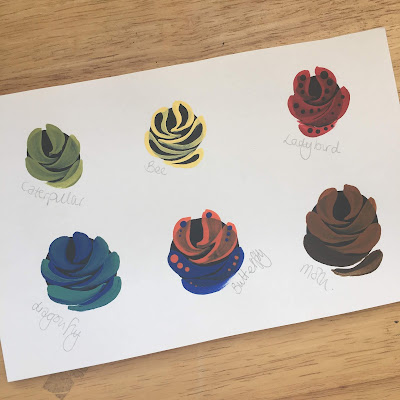
Vintage roses in a variety of fun colours inspired by wildlife - such a unique idea.

Stepping away from shapes and projects, Helen has used the Flora and Fauna theme to inspire her colour choices in her practice pages...what a great idea.  

Sandra from You Can Folk It designed this dragonfly project for our #funwithfolkit painting challenge.  She combined our Delicate lace design and dot patterns to complete the project.

Sandra felt inspired after creating our Bee tutorial to create a different project.  Featuring a unique Dragonfly design on the lid, she added a few dot daisies and vintage lace to the box to complete it. 

This wooden duck from Nazlie is just stunning. Decorated using our Vintage Rose painting kit

These ducks are so popular at the minute with crafters.  Using a French blue base coat and our Vintage Rose kit, Nazlie from Cositas Bonitas has turned this into a real centrepiece. 

Freestanding wooden decorations are great to decorate with Folk It painting kits available from www.folkit.co

Who would have thought a Folked up owl would look so pretty! Helen from Mindful Crafts used our popular Round Brush Starter kit to decorate this owl beautifully.

Vikki fell in love with her You Can Folk It Starter Kit and started getting creative - she creates such great designs with her dotting tool.

Vikki discovered our stand and our kits at the Handmade Fair and she's been hooked ever since - we love the original and unique designs she has been creating with her dotting tool and this Dragonfly design worked perfectly for June's theme! 

So as we head in to July, this month in our #funwithfolkit painting challenge, we are concentrating on wreaths.  Whether they are dotty or festive, floral or not, we can't wait to see them all! 

Happy Folking! 


SHARE:
© You Can Folk It!. All rights reserved.
designed by pipdig