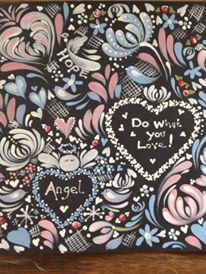
So you have painted up something you are proud of and you want to add writing as a finishing touch but what do you use? There are a number of options available and your choice may depend on the finished look you want and personal preference so here are a few of our favourites for you to choose from.
1. Transfers
Our Series 2 kits contain phrases and words for you to transfer onto your projects. For each project we have created tailor made transfers for each one. We understand that not everyone likes their handwriting or you may want something a bit more formal to finish off your masterpiece and once you have got to grips with using the transfers you can create your own to add to those projects and to ones from Series 1 if you wish.
 |
| Transfers make it easy to add phrases and words to projects. |
Trust us, if you practice enough, you can learn to use your liner brush well enough to write with it. It's true, it takes commitment and yes, there may be times when you want to throw the brush and your paints through the window and wish to never see them again. However, trust us when we say it is so worth it when you paint with a flow that wasn't there before. Give your work a finished look by adding dots of paint at the ends of your lines.
 |
| It is possible to use a liner brush to write onto your project |
Another option is to draw letters onto your work and fill them in with paint. This is quite difficult on smaller projects but possible on larger ones. We have pinned a great tutorial showing you how to do this here.
 |
| Draw and paint on letters to your project |
3. Permanent markers
These are a great option for writing onto your project and like paint, using different colours can give you a different look. There are a few things to remember when using these though...
You have to leave your project to dry. Yes, it seems like an obvious thing to say but we've all been there; we are excited, we think the paint is dry or we hope we can get away with it, or most irritating of all, 99% of it is dry and just as we are finishing off our masterpiece, the paint catches and you can't hide it. If in doubt, leave it for an extra couple of hours. When you are writing with the permanent marker, you will find it does clog up. You're paint is dry so why is this happening? The reason is that your paint will still pick up a bit of 'transfer' that clogs up the end of the pen. Don't worry, all you need to do is keep wiping the tip of your pen with a piece of tissue.
 |
| Add writing with a permanent marker - play with colour and nib widths. |
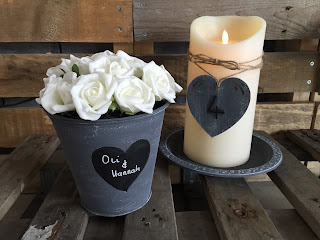
Available in a range of sizes (the tips range from extra thick to ultra fine) and colours (including metallic) these pens can be used on a wide range of surfaces. If you have seen some of our previous tutorials, you will have seen that Carol is a fan of these and has used them to personalise table decorations recently for her sons wedding. These are a great alternative to using a liner brush, especially on curved and uneven surfaces. If you would like more information, you can find it here.
 |
| Carol used Posca pens to personalise table decorations |
Although this is not a medium we use at Folk It, we know a lot of our Folkers, being a crafty lot, have other resources available to them. Providing beautiful, uniform writing, stamps and stickers are a fantastic option and our many people often use these to add sentiments and writing to their project. With many great designs available, there is one for any project. Whether stamped directly onto the project or onto card and added as an embellishment, it can be the finishing touch to your work.
 |
| Stamp directly onto your project or, create a little embellishment as one of our Folkers has done here. |
So there you have our top five ways to add writing. These are by no means the only options available but these are the ones we use and see most often. If you use a different method, we would love to hear about it.
Happy Folking,
The Folk It team x


No comments
Post a Comment